Abstract
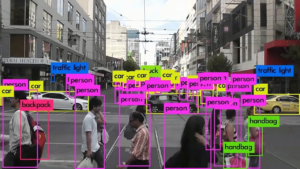
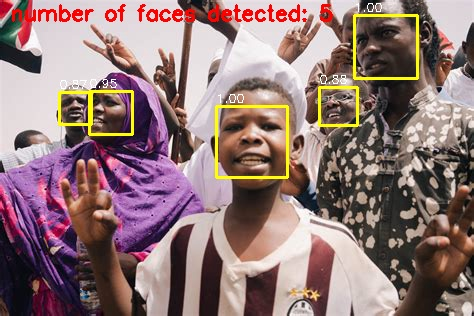
YOLOV3 is a state-of-the-art object recognition algorithm which can be trained on any kind of data and it will detect that particular object precisely wherever it might be. With the combination of yolo and deep learning module in OpenCV we have achieved a more precise recognizing the face model. When an image is passed to the model, this will try to find the images and draws a kind of bounding box around them, which might be easier for users to understand, along with the bounding boxes, this will also display how confident the model is in predicting the persons face.

Algorithm Description
YOLOv3 is an abbreviation word for You look only once, where this algorithm has shaken most of the developers all around the world in the past 5 years, due to its immense ability to quickly learn and remember any object we have trained or labelled it. There is a unique method to work with yolo models where we require the images to be labelled firstly using specific tools available online or installing it in your local machine. (Labelling software’s links are provided below). the labelling process might take a long time depending upon on your dataset. The images are labelled according to the specification made by the user, whether we’d like to detect multiple objects in an image are single object, depending on it, the text file is created with following parameters,
The class of the objects, starting from 0,1,2.
The coordinates of the bounding box drawn.

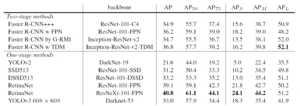
Comparatively YOLOV3 work faster when comapred to some other recognizing the face models out there in today’s world with the use of independent logistic classifiers and binary cross-entropy loss for the class predictions during training

Reference:
How to Execute?
Make sure you have checked the add to path tick boxes while installing python, anaconda.
Refer to this link, if you are just starting and want to know how to install anaconda.
If you already have anaconda and want to check on how to create anaconda environment, refer to this article set up jupyter notebook. You can skip the article if you have knowledge of installing anaconda, setting up environment and installing requirements.txt
- Install the prerequisites/software’s required to execute the code from reading the above blog which is provided in the link above.
- Press windows key and type in anaconda prompt a terminal opens up.
- Before executing the code, we need to create a specific environment which allows us to install the required libraries necessary for our recognizing the face project.
- Type conda create -name “env_name”, e.g.: conda create -name project_1
- Type conda activate “env_name, e.g.: conda activate project_1
- Go to the directory where your requirement.txt file is present.
- cd <>. E.g., If my file is in d drive, then
- d:

7.cd d:\License-Plate-Recognition–main #CHANGE PATH AS PER YOUR PROJECT, THIS IS JUST AN EXAMPLE

8. If your project is in c drive, you can ignore step 5 and go with step 6
9. g., cd C:\Users\Hi\License-Plate-Recognition-main
10. CHANGE PATH AS PER YOUR PROJECT, THIS IS JUST AN EXAMPLE
11. Run pip install -r requirements.txt or conda install requirements.txt (Requirements.txt is a text file consisting of all the necessary libraries required for executing this python file. If it gives any error while installing libraries, you might need to install them individually.)

12. To run .py file make sure you are in the anaconda terminal with the anaconda path being set as your executable file/folder is being saved. Then type python main.pyin the terminal, before running open the main.py and make sure to change the path of the dataset.
13. If you would like to run .ipynb file, Please follow the link to setup and open jupyter notebook, You will be redirected to the local server there you can select which ever .ipynb file you’d like to run and click on it and execute each cell one by one by pressing shift+enter.
14. Run yolo_face.py in your anaconda terminal and make sure to change the path where your executable files are located.
Example: python yoloface.py –image samples/demo.jpg –output-dir outputs/
Please follow the above links on how to install and set up anaconda environment to execute files.
Data Description
The Datafile which was used in this recognizing the face project was some yolov3 configuration files, A configuration or .cfg file is nothing but a detailed explanation about the number of parameters being used in the model. A typical cfg files consists of all the parameters required for training and test our model. Some of the parameters such as, Learning rate, convolutional filters, mask, number of classes etc.
Final Results


Issues you may face while executing the code
- We might face an issue while installing specific libraries.
- Make sure you have the latest version of python, since sometimes it might cause version mismatch.
- Adding path to environment variables in order to run python files and anaconda environment in code editor, specifically in visual studio code.
- Refer to the Below links to get more details on installing python and anaconda and how to configure it.
https://techieyantechnologies.com/2022/07/how-to-install-anaconda/
- Loading an understanding the transfer learning concept might be tricky at the start. Please refer to the algorithm description to learn more about transfer learning.
Note:
All the required data has been provided over here. Please feel free to contact me for any issues.
Click Here For The Source Code And Associated Files.
Let’s Connect
https://www.linkedin.com/in/abhinay-lingala-5a3ab7205/
Yes, you now have more knowledge than yesterday, Keep Going.

