Abstract
Color Retinal image enhancement project deals with enhancing the quality of the image of an eye. So basically, retinal imaging is a process of capturing retinal images of an eye which are very complicated and requires a lot of processing and sophisticated machines are used to capture those images. Now when we look at one of those images, we might see that the images might be kind of little blur or brightness might be low or high. So here we have applied some techniques, such as contrast adjustment and increasing the luminosity of the images to enhance the quality of an eye which might help the doctors or professional working on this domain to get a clear view of the project/image they are looking for.
Algorithm Description
So, in order to get the contrast adjustment and enhancement unlike traditional Image Enhance library, we have gone with Equalization histogram where we have converted our image in the form of a histogram and wherever we found that the bins are clustered around, the equilize_hist(), that we are going to use, what it does is it will stretch out that portion of image making the specific object in that image to be highlighted than usual. Apart from this technique we have also used some basic OpenCV filters to enhance the quality of an image such as Adjusting the brightness using filters, threshold adjustment, sharpening the image.
DOWNLOAD BASE PAPER
https://www.academia.edu/51841498/Analytical_Adjustment_of_Image_Contrast
How to Execute?
Make sure you have checked the add to path tick boxes while installing python, anaconda.
Refer to this link, if you are just starting and want to know how to install anaconda.
If you already have anaconda and want to check on how to create anaconda environment, refer to this article set up jupyter notebook. You can skip the article if you have knowledge of installing anaconda, setting up environment and installing requirements.txt
- Install the prerequisites/software’s required to execute the code from reading the above blog which is provided in the link above.
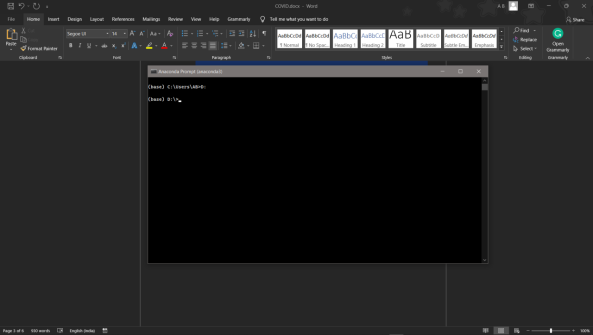
- Press windows key and type in anaconda prompt a terminal opens up.
- Before executing the code, we need to create a specific environment which allows us to install the required libraries necessary for our project.
- Type conda create -name “env_name”, e.g.: conda create -name project_1
- Type conda activate “env_name, e.g.: conda activate project_1
- Go to the directory where your requirement.txt file is present.
- cd <>. E.g., If my file is in d drive, then
- d:

7.cd d:\License-Plate-Recognition–main #CHANGE PATH AS PER YOUR PROJECT, THIS IS JUST AN EXAMPLE
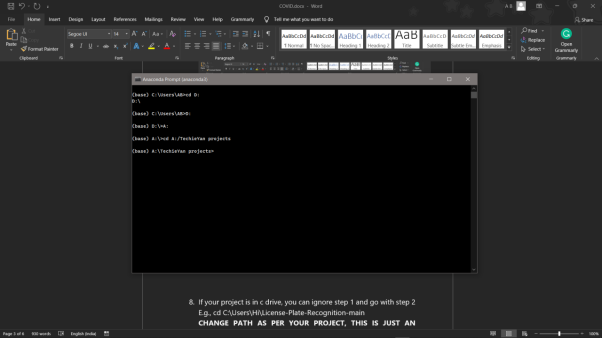
8. If your project is in c drive, you can ignore step 5 and go with step 6
9. g., cd C:\Users\Hi\License-Plate-Recognition-main
10. CHANGE PATH AS PER YOUR PROJECT, THIS IS JUST AN EXAMPLE
11. Run pip install -r requirements.txt or conda install requirements.txt (Requirements.txt is a text file consisting of all the necessary libraries required for executing this python file. If it gives any error while installing libraries, you might need to install them individually.)

12. To run .py file make sure you are in the anaconda terminal with the anaconda path being set as your executable file/folder is being saved. Then type python main.pyin the terminal, before running open the main.py and make sure to change the path of the dataset.
13. If you would like to run .ipynb file, Please follow the link to setup and open jupyter notebook, You will be redirected to the local server there you can select which ever .ipynb file you’d like to run and click on it and execute each cell one by one by pressing shift+enter.
Please follow the above links on how to install and set up anaconda environment to execute files.
Data Description
Specifically, we didn’t use any kind of dataset since we are trying to load the images manually and applying filters on top of it, so we haven’t used any datasets.
Final Results
Issues you may face while executing the code
- We might face an issue while installing specific libraries.
- Make sure you have the latest version of python, since sometimes it might cause version mismatch.
- Adding path to environment variables in order to run python files and anaconda environment in code editor, specifically in visual studio code.
- Refer to the Below link to get more details on installing python and anaconda and how to configure it.
Note:
All the required data hasn’t been provided over here. Please feel free to contact me for any issues.
Click Here To Download This Code And Associated File.
Let’s Connect
https://www.linkedin.com/in/abhinay-lingala-5a3ab7205/
Yes, you now have more knowledge than yesterday, Keep Going.