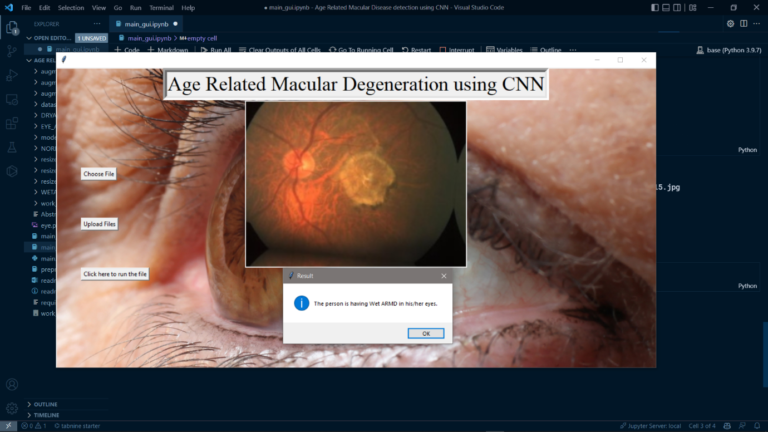
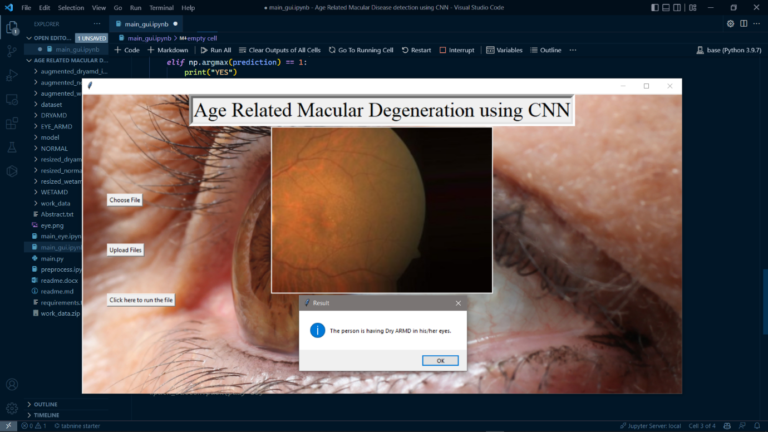
Age Related Macular Degeneration is a type of eye disease which normally affects the central vision of a person. This Disease might sometimes lead to permanent vision loss in some persons and mostly this might affect the people who are aged above 50. This age related macular disease doesn’t lead to permanent vision loss but it will definitely impact the peripheral vision. So, basically there are 2 different types of ARMD i.e., Dry and Wet, Dry ARMD will generate a tiny amount of protein deposits called drusen, whereas Wet ARMD occurs whenever any abnormal blood vessel is developed under the retina, so sometimes this blood vessels might leak blood fluid, this type of ARMD is very severe and can even lead to severe permanent central vision loss.
Algorithm Description
So, we have used Convolutional neural networks to identify whether a person is affected with ARMD Disease or not, as we all know, how sophisticated CNNs are and how they can learn almost anything like a brain does, this can help us save a lot of time and also giving almost accurate predictions for the disease. As we discussed convolutional neural networks are very sophisticated and more advanced version of neural networks, these are very superior to other neural networks which works better with images and audio/speech input signal. A CNN network comprises of 3 important layers such as a convolutional layer, pooling layer and fully connected layer. we can have as many layers as possible depending on the domain and project we are working on.
Note: Make sure you have checked add to path check boxes at the end of installation process, which solves a major problem of code execution error.
If you are just starting and want to know how to install anaconda refer to this link. or If you already have anaconda and want to check on how to create anaconda environment,
If you already have anaconda and want to check on how to create anaconda environment,set up jupyter notebook refer to this article. You can skip the article if you have knowledge of installing anaconda, setting up environment and installing requirements.txt
open anaconda prompt using windows key and type in anaconda prompt, after which create a new environment.
– conda create -n “env_name”
– conda activate “env_name”
Install necessary libraries from requirements.txt file provided.
Go to the directory where your requirement.txt or your code file is present.
cd <<directory of your file>>. E.g., If my file is in d drive, then
cd d:
cd d:\License-Plate-Recognition-main CHANGE PATH AS PER YOUR PROJECT, THIS IS JUST AN EXAMPLE
If your project is in c drive, you can ignore step 6 and step 7.
E.g. cd C:\Users\Hi\License-Plate-Recognition-main
CHANGE PATH AS PER YOUR PROJECT, THIS IS JUST AN EXAMPLE
Run pip install -r requirements.txt or conda install requirements.txt (Requirements.txt is a text file consisting of all the necessary libraries required for executing this python file. If it gives any error while installing libraries, you might need to install them individually either by removing their version number or try to refer official pypi (https://pypi.org/) website.) locate your path in the anaconda prompt where your executable file/folder is saved, eg: cd A:/project1/project2/main_project, then press enter.
Run python main.py in your terminal (The .py files should be executed on your terminal.)
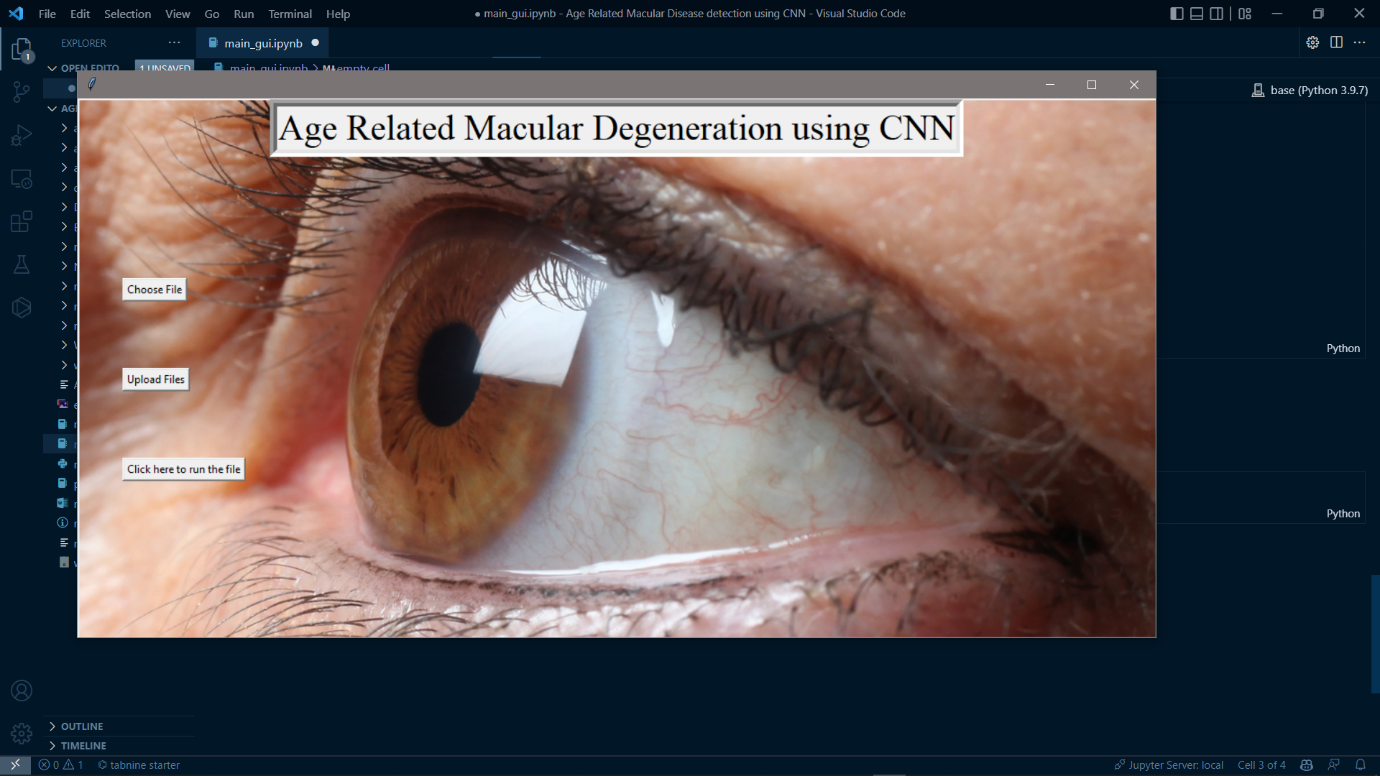
In order to run main_gui.ipynb. You can even try running main_eye.ipynb to get a feel of model creation and preprocess.ipynb to get a feel of pre-processing steps taken.
(Open anaconda prompt follow the steps 2, 3, 4 then type in “jupyter notebook” a webpage is opened in your browser, there you need to select a .ipynb file to execute and then execute the code cell by cell using shift+enter.)
Data Description
So, the dataset in the project was collected from a private repository and consist of two classes of images each class consists of 50 images each, Dry and Wet. Along with these two classes, we have also used No ARMD/Normal people eye dataset combined with other two classes. Below are some sample images of 3 classes.
Note: The dataset hasn’t been provided in the associated files below are some links to download the demo dataset, if you need full dataset please contact us.