
Deep Fake Video Detection Using Deep Learning and Tkinter GUI
Abstract
Deep Fake Video/Image has been around since last decade where we are trying to mimic the behaviour, expression, lip and eye movement made by another person on top of another person, which is then synced to each other. These are then used for some illegal and legal activities by people like border crossing, financial thefts etc. So, in order to solve this problem, we can use the model above, where it helps us to identify whether a particular video fake or not using Transfer Learning and LSTM.
Code Description & Execution
Algorithm Description
So, we have used Transfer Learning methodology to identify whether a given video has been altered or is it fake or not, as we all know, how hard it becomes to train and test a model on huge amount of data and still not getting that right accuracy that we wanted it really break your heart, I mean we spend like hours training that model and still not getting the right accuracy ewwww, so that we were transfer Learning comes into picture where we load a pretrained model, be it Resnet, Vgg16 or any other model. These models are trained on like millions of images and when we load and train this model on top of our images/ data the features on which the data has been previously trained gets shared by our data, in simple case, the weights of the previous model are shared by our data which we are trying to train, in that way our model will learn even better and provide better accuracy, than training it from scratch.
Reference:
How to Execute?
Note: Make sure you have checked add to path check boxes at the end of installation process, which solves a major problem of code execution error.
If you are just starting and want to know how to install anaconda refer to this link.
If you already have anaconda and want to check on how to create anaconda environment, set up jupyter notebook refer to this article. You can skip the article if you have knowledge of installing anaconda, setting up environment and installing requirements.txt
After installing, python, anaconda and any code editor which is optional.
- After that open anaconda prompt and create an environment, the details of how to install the specific software and adding the path to environment variables are given in a specific blog, which is given above.
- After creating an environment, activate and install the necessary libraries required for the project, which will be provided in requirements.txt, this can be executed by following command. (pip install -r requirements.txt) or if you face any issue while working with requirements.txt, you can download specific libraries/modules manually, example pip install pandas or pip install “module_name”.
- Go to anaconda prompt, type cd “Path where your executable file is located” and press enter. Example: cd A:/Project/project2
- If you are working with .ipynb file you might need to go into jupyter notebook, to do that we can Type in jupyter notebook in the anaconda prompt, make sure you are in the specific location where your executable file/folders located and press enter, Then you will e redirected to a local webpage, where you need to select the file you want to run and press shift enter to run the code cell.
- Run python main_predict.py in your terminal, or run main_predict.ipynb. (The .py files should be executed on your terminal and .ipynb files should be executed directly in the code editor) Note: For simplicity I have executed only the main_predict.py file by loading the weight of the model which was actually trained on huge amount of data, due to computational cost and time constraint and I have chosen to run only the main_predict file.
Data Description
The Dataset can be downloaded from multiple sources, the links are below and some GitHub repositories also host the dataset which can be downloaded and trained on our model.
1.https://www.kaggle.com/competitions/deepfake-detection-challenge/data
2.https://github.com/yuezunli/celeb-deepfakeforensics/tree/master/Celeb-DF-v1
3.https://github.com/ondyari/FaceForensics
Issues you may face while executing the code
- Installing specific face recognition library.
Steps:
- Download the .whl files from the GitHub repository (https://github.com/codexsys-7/Deep-Fake-Video-Detection-Using-Deep-Learning-and-Tkinter-GUI) i.e., face_recognition_lib folder and locate the folder in the anaconda prompt.
- open anaconda command prompt and locate the path where you have saved your dlib/face_recognition files, then create an environment.
- pip install dlib-19.19.0-cp37-cp37m-win_amd64.whl, which ever version of python you use.(If you are using python 3.9 or above make sure you create a new environment with python 3.7 or 3.8, in order to create and activate new environment please refer the first article.) Example conda create -n myenv python==3.8
- pip install cmake
- pip install face_recognition
- Pre-processing and training the model takes lot of time since the dataset is being trained on huge amount of data.
- We might face an issue while installing specific libraries.
- Make sure you have the latest version of python, since sometimes it might cause version mismatch.
- Adding path to environment variables in order to run python files and anaconda environment in code editor, specifically in any code editor.
- Make sure to change the path in the code where your dataset/model is saved.
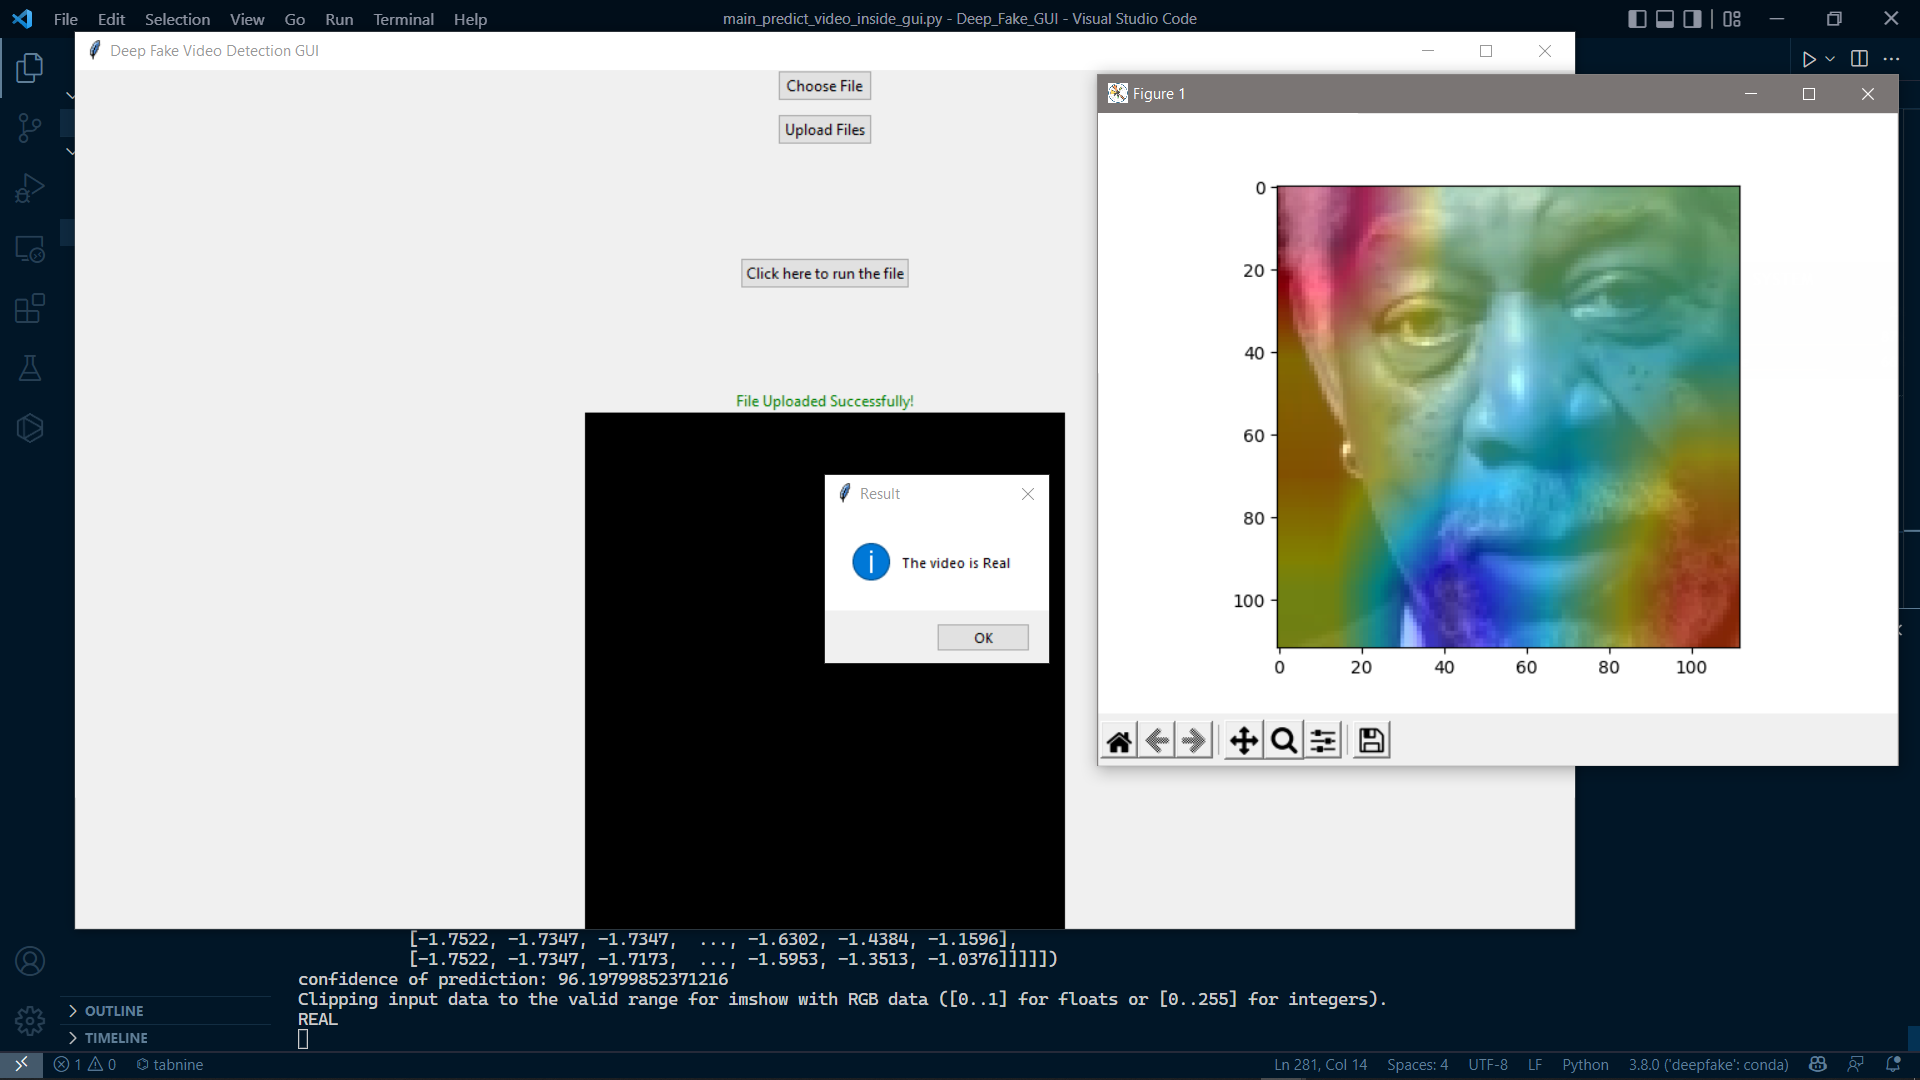
Results

