Personal Voice Assistant Using Python
Abstract
Scriptwriters and developers can benefit greatly from Python, as it is an ideal language to use. Using Python, let’s create a Voice Assistant script. Query parameters for the assistance can be customized according to the user’s need.
Voice Recognition is the process of audio-to-text conversion. This is currently used in voice assistants such as Alexa, Siri, etc. Python provides an API named Speech Recognition to enable us to convert audio to text for further processing. In this article, we will examine the possibility of converting long or large audio files into text using the Speech Recognition API in python.

Code Description & Execution
Programming Methodology
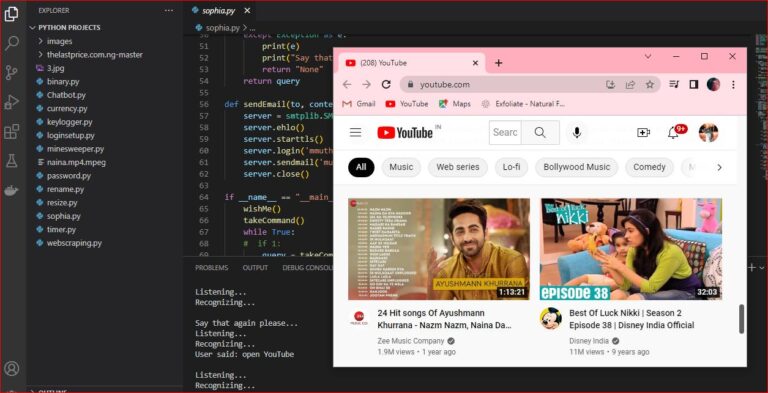
The first and foremost thing for an A.I. assistant is that he would have to be able to speak. To make our voice assistant speak, We we’ll do a function called speak() that function will take the audio as the argument, and then it will say it. Now the next thing we need is an audio. We need to provide the audio so we can pronounce it using the speak() feature we’ve created. Now, Install a library named as pyttsx3 (Convert text to speech). Now import the module in the code. In this, We can choose any voice from sapi5 (Microsoft developed an API). It gives us two voices male and female voice. Now let’s back to the speak() function now we pass an argument(audio) in say and RunAndWait command with these two commands it can be audible to us. The next most important thing for our assistant A.I. is that it should take control by means of the microphone of the user’s system. So now we’re going to make a takeCommand() function from takeCommand() function in our AI assistant. IT will resend you a string output by taking the input of the user’s microphone. We are now going to add a trial and exception block to our program to effectively manage errors. We will develop a logic for various commands such as Wikipedia research, music, etc. If you want to open some website we need to import web browser in the code which helps the A.I Assistant to get access from any website. To Send a Email, We have to make function named as sendEmail() which will help us the user to send emails to one or more than one users by importing smtplib (Which allows the user to send and receive the mails) module.
Note: Give access from your gmail account. Otherwise, the function won’t work properly.
Now, We are now going to add a trial and exception block to our program to effectively manage errors.
How to Execute?
Note: Make sure you have added path while installing the software’s.
http://techieyantechnologies.com/2022/07/how-to-install-anaconda/
- Install the prerequisites/software’s required to execute the code from reading the above blog which is provided in the link above.
- Press windows key and type in anaconda prompt a terminal opens up.
- Go to the directory where your requirement.txt file is present, not just requirement.txt, if you want to execute any .py or .ipynb files, you need to go to that specific folder or path, where they are saved.

4.<<directory of your file:>>. E.g., If my file is in d drive, then
5.Type d:

- cd d:\License-Plate-Recognition-main #CHANGE PATH AS PER YOUR PROJECT, THIS IS JUST AN EXAMPLE

7. If your project is in c drive, you can ignore step 4 and go with step 5
8. Run pip install -r requirements.txt or conda install requirements.txt (Requirements.txt is a text file consisting of all the necessary libraries required for executing this python file. If it gives any error while installing libraries, you might need to install them individually.), example: pip install “module_name” i.e., pip install pandas

9. If you would like to run .ipynb file, Please follow the link to setup and open jupyter notebook, You will be redirected to the local server there you can select which ever .ipynb file you’d like to run and click on it and execute each cell one by one by pressing shift+enter.
Note: There are 4 different files each seeves different purpose such as,
- ipynb consists of all the data cleaning steps, which are necessary to build a clean and efficient model.
- ipynb consist of major steps and exploratory data analysis which allow us to understand more about the data and behavior of it.
- ipynb consists of data reduction/dimensionality reduction techniques such as Sequential feature selector method to reduce the dimensions in the data and compare the model scores before and after dimensionality reduction.
- ipynb consists of combination of main.ipynb and variable_selection.ipynb to make it more clear and understable for the audience.
Please follow the above sequence if you would like to execute and the files require good system requirements to run.
Results

Issues Faced
- We might face an issue while installing specific libraries, in this case, you might need to install the libraires manually. Example: pip install “module_name/library” i.e., pip install wikipedia
- Make sure you have the latest or specific version of python, since sometimes it might cause version mismatch.
- Adding path to environment variables in order to run python files and anaconda environment in code editor, specifically in any code editor.
- Make sure to change the paths in the code accordingly where your music file and VS code is saved.
Refer to the Below links to get more details on installing python and anaconda and how to configure it.
http://techieyantechnologies.com/2022/07/how-to-install-anaconda/
All the required data has been provided over here. Please feel free to contact me for model weights and if you face any issues in executing voice assistant .
http://techieyantechnologies.com/contact/
Yes, you now have more knowledge than yesterday, Keep Going.
